How to hang your curtains
When your beautiful new Made to Measure Curtains have arrived, it’s important to take the time to hang them correctly, allowing them to look their best. At Warner House, we offer deep pencil pleat and pinch pleat (double and triple) headings, with these headings requiring different preparation for hanging.
How to hang pinch pleat curtains
Before you start, make sure that you have the same number of curtain rings or gliders as you have pinch pleats.
As pinch pleat curtains are supplied already pleated, the preparation before hanging focuses mainly on deciding where your hooks are placed.
Start by laying your curtain face down on a clean, flat surface. If you are hanging your curtains on a pole, you will want the hook towards the top of the heading to ensure your curtains hang below the pole. If you are hanging your curtains on a track, you will want the hook to sit towards the middle of the heading so that it will cover the track.
When you have decided on where to place your hooks, insert your first hook into the curtain, slightly to one side of the pinch pleat (A). Make sure that the hook pierces both the exterior material and inner stiffener materials. Push the sharp end in the whole way so that only the hook itself is visible.
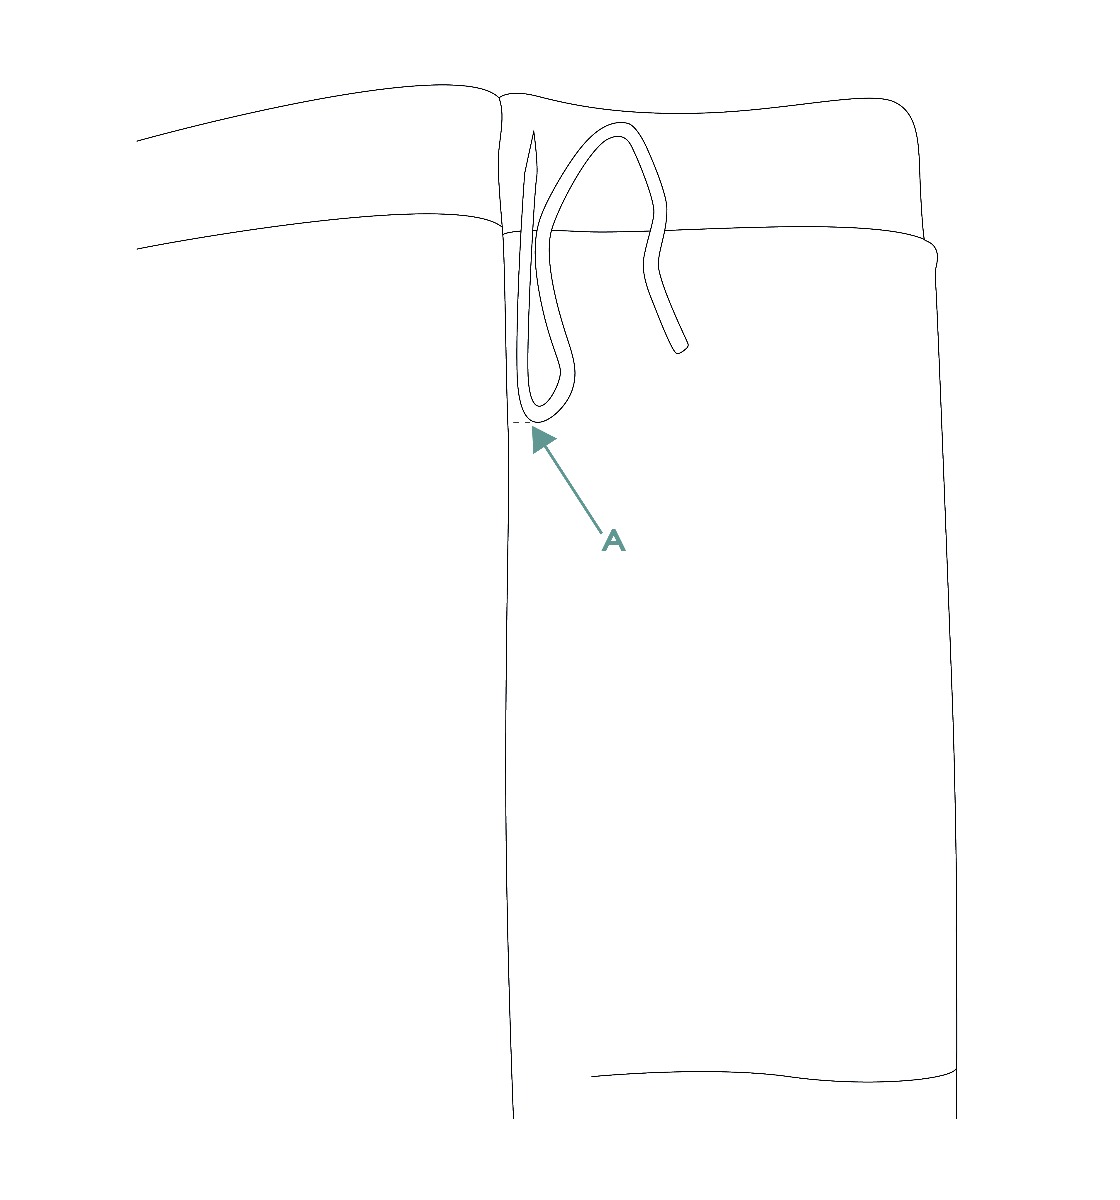
Insert 2 or 3 additional hooks before then lifting the curtain and hanging from these hooks, ensuring at all times that the rest of the curtain is held to support the weight. If possible, it is worth having a helping hand when hanging your curtains with someone holding the weight of the curtain while you attach the hooks to the rings or gliders.
Once fully relaxed, which is usually after a couple of weeks, curtains will usually hang a few centimetres lower, so you may want to take this into consideration when choosing the hanging position.
If you are happy with the positions of the curtain based on the placement of these curtain hooks, you can take the curtain back down again and continue to insert the remaining hooks so that there is one hook at each pleat.
Add a hook to the outer edge of each curtain.
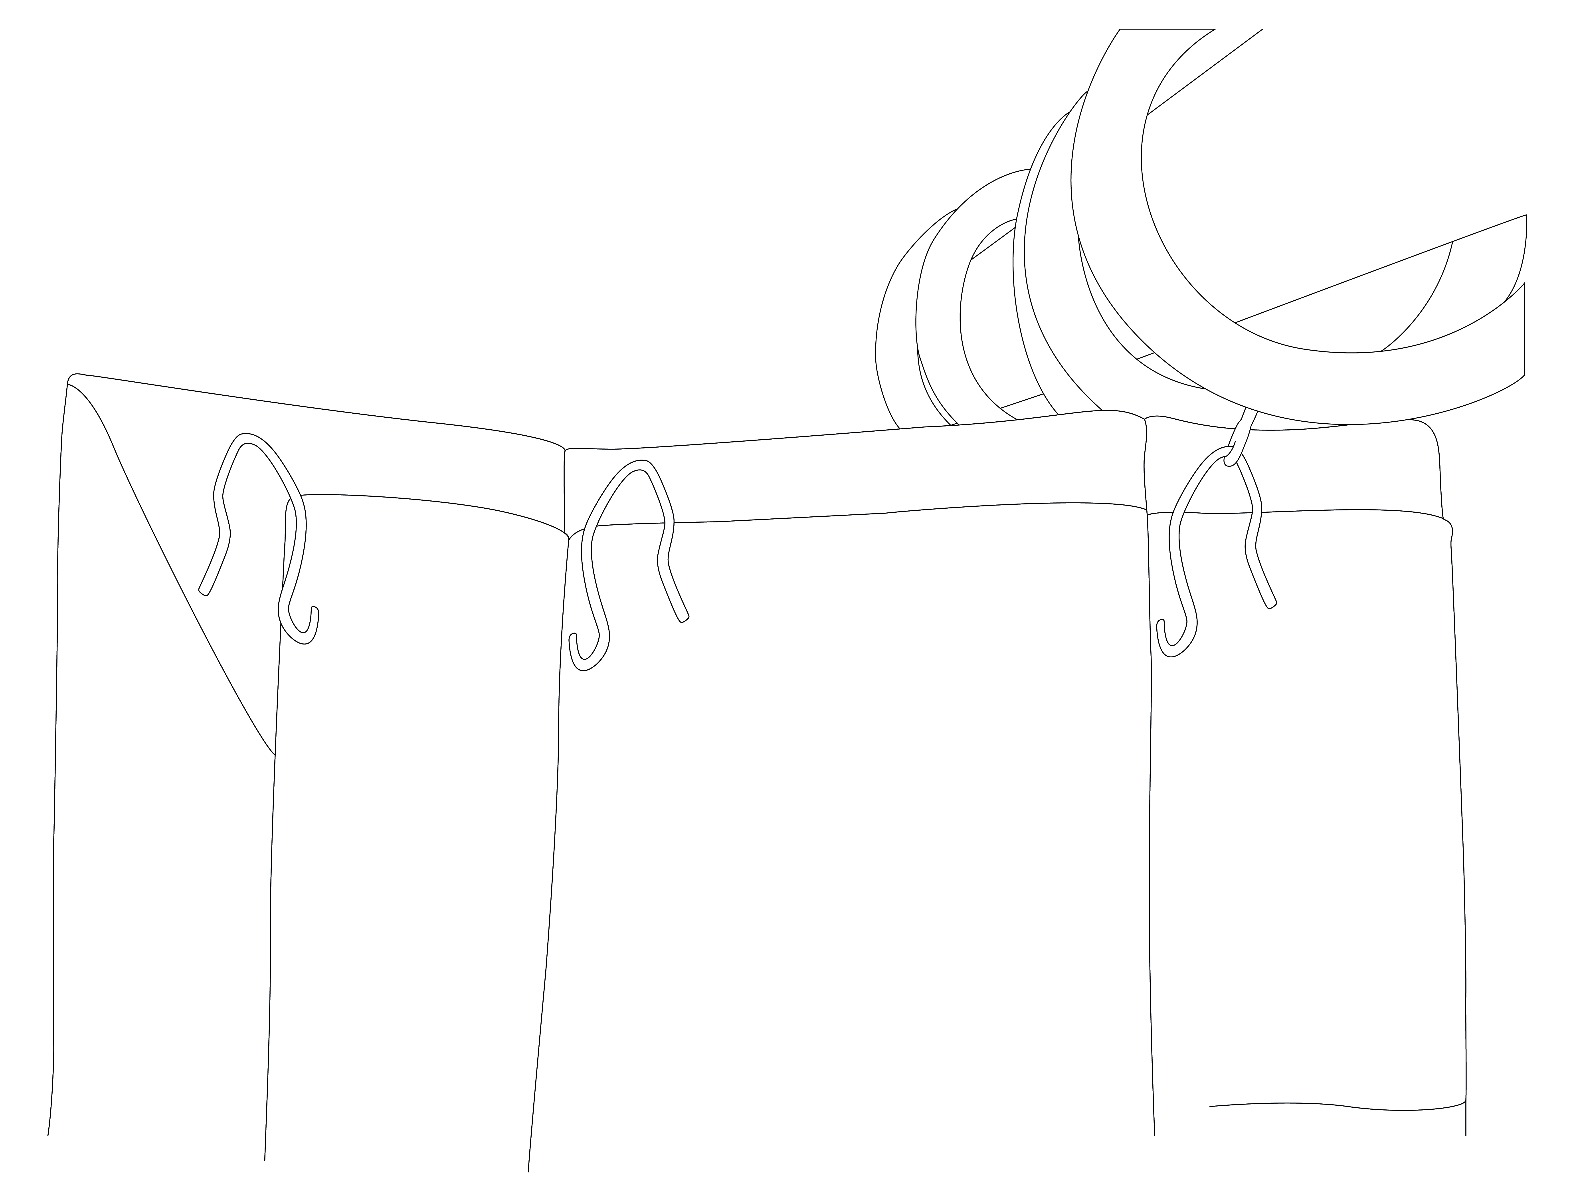
You are now ready to begin to hang your curtains, doing so by starting from the middle and working outwards. If at this point you notice that you are short a curtain ring or glider, you can add this on without having to take down the curtain. Again, if someone is available to help you with this, one of you can hold the curtains while the other attaches the hooks.
How to hang pencil pleat curtains
Pencil pleat headings require a little attention to detail to ensure that your curtains look their best once hung.
Start by lying your curtain face down on a clean, flat surface. You’ll then see a strip of curtain tape stitched across the top of your curtain which has three rows of string threaded through it. These strings will be used to gather your curtains into folds, but before you pull any of these strings you need to ensure that one end of all the strings is tied into a knot to stop them being pulled all the way through.
Once you’ve done this, pull all three strings at the same time to gently create a gathered effect. How much or how little you pull these strings is down to you, however rule of thumb is to aim for each curtain to be gathered to a width of half the track or pole length, plus a centimetre or two for overlap.
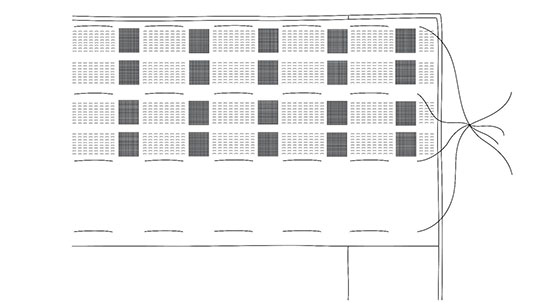

You may wish to hold up your curtains against your window at this stage to ensure that you are happy with the width. When you have finished pulling the strings, you can tie them off to keep the heading at the achieved width. Using a slipknot here would allow you to easily untie the knot again in the future, should you wish to adjust. Avoid cutting any excess strings and instead wind them round your hand to create a loop before using a safety pin to keep them hidden behind the curtain.
With the curtains pulled up, you can now add the curtain hooks. Before you start, you may wish to simply place them across the heading so that you can ensure they are all evenly spread. When you’re happy with the positioning, you can then begin to insert the curtain hooks.
You’ll notice that there are three rows of pockets to choose from. If you are hanging the curtains on a track, you will likely need to insert the hooks into the bottom or middle row so that the heading hides the track. If you are hanging the curtains on a pole, you will need to insert the hooks into the top row of pockets to ensure the curtain is hung below the pole. Hooks should be placed into every four pockets. It’s important to place a hook on the outside edge of the curtain too, as this will ensure that your curtain will stay securely at the end of the track or pole when it is pulled closed.
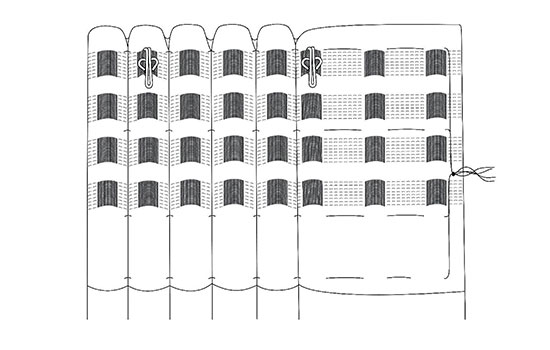

With the hooks all in place, you are ready to hang your curtains. We’d always recommend seeing if there is someone to help you with this part, for example a friend holds the weight of the curtain while you attach the hooks to the curtain pole or track. Always ensure that the final curtain hook is secured to prevent curtains sliding too far. On a pole, this involves making sure the final hook is attached between the bracket and the finial and on a track, the final hook should be attached to the fixed glider at the end.
When your beautiful new curtains have arrived, it’s important to take the time to hang them correctly, allowing them to look their best. At Warner House, we offer deep pencil pleat and pinch pleat (double and triple) headings, with these headings requiring different preparation for hanging.
How to hang pinch pleat curtains
Before you start, make sure that you have the same number of curtain rings or gliders as you have pinch pleats.
As pinch pleat curtains are supplied already pleated, the preparation before hanging focuses mainly on deciding where your hooks are placed.
Start by laying your curtain face down on a clean, flat surface. If you are hanging your curtains on a pole, you will want the hook towards the top of the heading to ensure your curtains hang below the pole. If you are hanging your curtains on a track, you will want the hook to sit towards the middle of the heading so that it will cover the track.
When you have decided on where to place your hooks, insert your first hook into the curtain, slightly to one side of the pinch pleat (A). Make sure that the hook pierces both the exterior material and inner stiffener materials. Push the sharp end in the whole way so that only the hook itself is visible.

Insert 2 or 3 additional hooks before then lifting the curtain and hanging from these hooks, ensuring at all times that the rest of the curtain is held to support the weight. If possible, it is worth having a helping hand when hanging your curtains with someone holding the weight of the curtain while you attach the hooks to the rings or gliders.
Once fully relaxed, which is usually after a couple of weeks, curtains will usually hang a few centimetres lower, so you may want to take this into consideration when choosing the hanging position.
If you are happy with the positions of the curtain based on the placement of these curtain hooks, you can take the curtain back down again and continue to insert the remaining hooks so that there is one hook at each pleat.
Add a hook to the outer edge of each curtain.

You are now ready to begin to hang your curtains, doing so by starting from the middle and working outwards. If at this point you notice that you are short a curtain ring or glider, you can add this on without having to take down the curtain. Again, if someone is available to help you with this, one of you can hold the curtains while the other attaches the hooks.
How to hang pencil pleat curtains
Pencil pleat headings require a little attention to detail to ensure that your curtains look their best once hung.
Start by lying your curtain face down on a clean, flat surface. You’ll then see a strip of curtain tape stitched across the top of your curtain which has three rows of string threaded through it. These strings will be used to gather your curtains into folds, but before you pull any of these strings you need to ensure that one end of all the strings is tied into a knot to stop them being pulled all the way through.
Once you’ve done this, pull all three strings at the same time to gently create a gathered effect. How much or how little you pull these strings is down to you, however rule of thumb is to aim for each curtain to be gathered to a width of half the track or pole length, plus a centimetre or two for overlap.
You may wish to hold up your curtains against your window at this stage to ensure that you are happy with the width. When you have finished pulling the strings, you can tie them off to keep the heading at the achieved width. Using a slipknot here would allow you to easily untie the knot again in the future, should you wish to adjust. Avoid cutting any excess strings and instead wind them round your hand to create a loop before using a safety pin to keep them hidden behind the curtain.
With the curtains pulled up, you can now add the curtain hooks. Before you start, you may wish to simply place them across the heading so that you can ensure they are all evenly spread. When you’re happy with the positioning, you can then begin to insert the curtain hooks.
You’ll notice that there are three rows of pockets to choose from. If you are hanging the curtains on a track, you will likely need to insert the hooks into the bottom or middle row so that the heading hides the track. If you are hanging the curtains on a pole, you will need to insert the hooks into the top row of pockets to ensure the curtain is hung below the pole. Hooks should be placed into every four pockets. It’s important to place a hook on the outside edge of the curtain too, as this will ensure that your curtain will stay securely at the end of the track or pole when it is pulled closed.
With the hooks all in place, you are ready to hang your curtains. We’d always recommend seeing if there is someone to help you with this part, for example a friend holds the weight of the curtain while you attach the hooks to the curtain pole or track. Always ensure that the final curtain hook is secured to prevent curtains sliding too far. On a pole, this involves making sure the final hook is attached between the bracket and the finial and on a track, the final hook should be attached to the fixed glider at the end.


